0%

开始

在使用vue编写大型项目时,经常使用的一种国际化方案为Vue i18n。

其中大部分的使用看官网就够了,这里仅记录一些在实际使用中的问题。

问题

  • t()和tc()
    这两个方法在大部分情况下展现一致,以至于经常有人混用。事实上,在大部分情况下都应该使用t(),tc()方法适用于复数,它会让 ‘|’ 无法展示。源码中tc()有这么一段:

    1
    const choices = message.split('|'); // line:1807

    因此,如果你的message中含有 ‘|’, 请不要使用tc()。

  • 复用性
    在一些form表单中,实现i18n可能会显得非常繁复,很多i18n的字段只有一个地方会用到,比如一个简单的form表单:

    1
    2
    3
    4
    5
    6
    7
    8
    9
    10
    11
    <el-form :model="numberValidateForm" ref="numberValidateForm" label-width="100px" class="demo-ruleForm">
    <el-form-item
    label="年龄"
    prop="age"
    :rules="[
    { required: true, message: '请输入年龄'}
    ]"
    >
    <el-input type="age" v-model.number="numberValidateForm.age" autocomplete="off" placeholder="请输入年龄"></el-input>
    </el-form-item>
    </el-form>

    在这个form表单中,’年龄’需要i18n,’请输入年龄’也需要,这样i18n就占了两行

    1
    2
    3
    4
    {
    age: '年龄',
    agePlaceholder: '请输入年龄'
    }

    每个字段的i18n就是两倍的工作量,如果i18n还分了模块,代码就变得冗余:$('modelA.modelB.age')$('modelA.modelB.agePlaceholder')
    对于这种情况,完全可以写一个方法来代替,如

    1
    2
    3
    4
    5
    6
    7
    8
    9
    10
    11
    12
    13
    placeholder(key, inputType = 0, lengthOption = { min: 1, max: 128 }) {
    // 1 input 2 pick 3 length
    const name = this.$t(`modelA.modelB.${key}`);
    if (inputType === 0) {
    return name;
    } else if (inputType === 1) {
    return this.$t('modelA.modelB.nullPrompt') + name;
    } else if (inputType === 2) {
    return this.$t('modelA.modelB.nullPick') + name;
    } else if (inputType === 3) {
    return name + this.$t('modelA.modelB.nameLength', lengthOption);
    }
    },
过程

由于需要在vue项目中使用echarts图表,基于canvas的echarts不能随窗口大小改变而改变。这时就需要监听窗口大小,并实时执行echarts的resize方法。

1. 向 Window 对象添加事件句柄
1
2
3
4
5
6
7
8
9
10
11
mounted() {
window.addEventListener('resize', this.resizeHandler)
},
destroyed() {
window.removeEventListener('resize', this.resizeHandler)
},
methods:{
resizeHandler(){
// do something
}
}
2. 在 window 的onresize中挂载方法
1
2
3
4
5
6
7
8
9
10
11
12
13
14
15
16
17
18
19
20
21
22
23
24
25
26
27
watch: {
screenWidth(val) {
// 为了避免频繁触发resize函数导致页面卡顿,使用定时器
if (!this.timer) {
// 一旦监听到的screenWidth值改变,就将其重新赋给data里的screenWidth
this.screenWidth = val
this.timer = true
const that = this
setTimeout(function() {
// 打印screenWidth变化的值
console.log(that.screenWidth)
that.timer = false
// do something
}, 400)
}
}
},
mounted () {
// 监听页面大小变化
const that = this
window.onresize = () => {
return (() => {
window.screenWidth = document.body.clientWidth
that.screenWidth = window.screenWidth
})()
}
}

这种方法略显臃肿,而且data里还需要额外维护两个变量

3. 使用 resize-observer-polyfill 监听dom大小变化

这个方法相比于前两个只能监听window大小变化,它可以监听元素大小变化。可以对页面中一些可变元素进行响应,使用方法来自element-ui源码,感谢这位老哥的发现:使用element-ui封装好的resize事件方法

使用代码转自这位老哥:

1
2
3
4
5
6
7
8
9
10
11
12
13
14
15
16
17
18
19
//先引入
//如果项目使用了element-ui,可以直接引用,或者copy一份放在自己的代码里
import { addResizeListener, removeResizeListener } from 'element-ui/src/utils/resize-event';

export default {
mounted(){
//可以在mounted这个钩子里初始化事件
addResizeListener(this.$el, this.resizeListener);
},
methods:{
resizeListener(){
//do something
}
},
//生命周期结束时销毁事件
destroyed() {
if (this.resizeListener) removeResizeListener(this.$el, this.resizeListener);
}
}

整理

在整个过程中,跟着源码看到了不少东西,不过没有系统性的去学习,只是大概了解了一下,这里做个整理

  1. Polyfills or Ponyfills?
  2. echarts官网 (在2021.1.28明天,echarts出新版本了。我看了一下,除了canvas,也有用svg渲染的图)
  3. resize-observer-polyfill

背景

由于业务需求,需要在钉钉小程序上实现一个手写签名的组件,参考了网上微信小程序实现手写签名的写法,结合自身实际需求,将其包装成一个popup弹出框的样式,同时参考了钉钉审批的手写签名样式。使用到的依赖有mini-ali-ui的popup和button组件。同时还有一个本地的图标。

1
2
3
4
5
6
7
{
"component": true,
"usingComponents": {
"popup": "mini-ali-ui-rpx/es/popup/index",
"button": "mini-ali-ui-rpx/es/button/index"
}
}

思路

具体实现是根据canvas来实现的,小程序端的canvas具体api大同小异,因此这个组件稍改一下应该在微信侧也能使用。

一些问题

  1. canvas的宽高必须固定,所以实现是根据实际拿到的宽width,乘以一个固定比值为高。在组件中直接传递即可。
  2. 必传参数dpr,参考如何解决画布模糊问题
  3. 或许是我理解错误,save和restore没有实现我想要的效果,所以撤回功能可能需要换一种方式实现。这里去掉了这个功能。
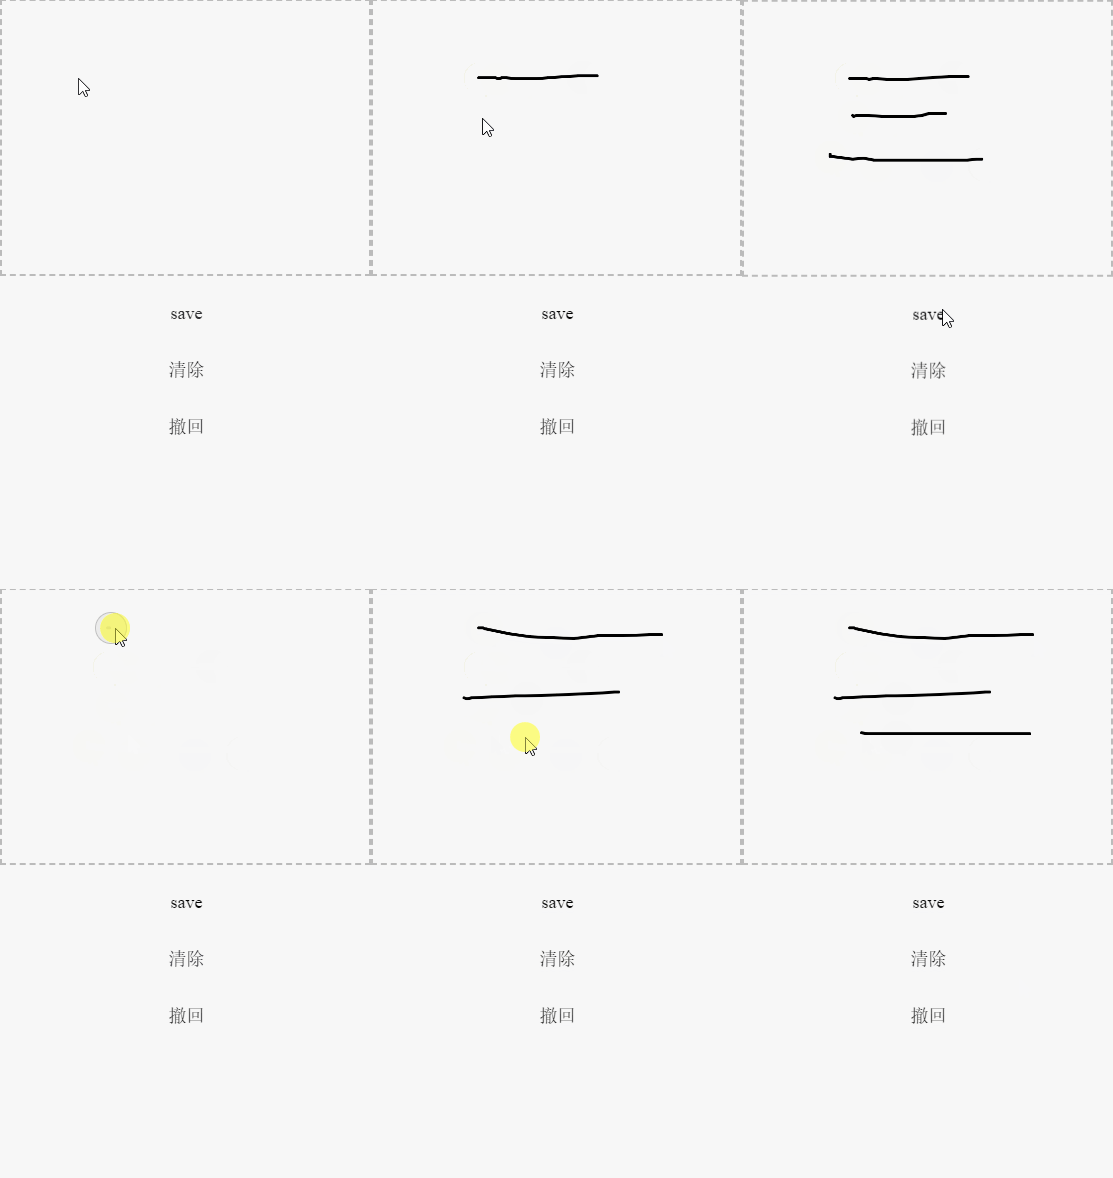
  4. clearRect不能清除,需要在之前加上一行content.beginPath(),无法理解这个问题如何产生。
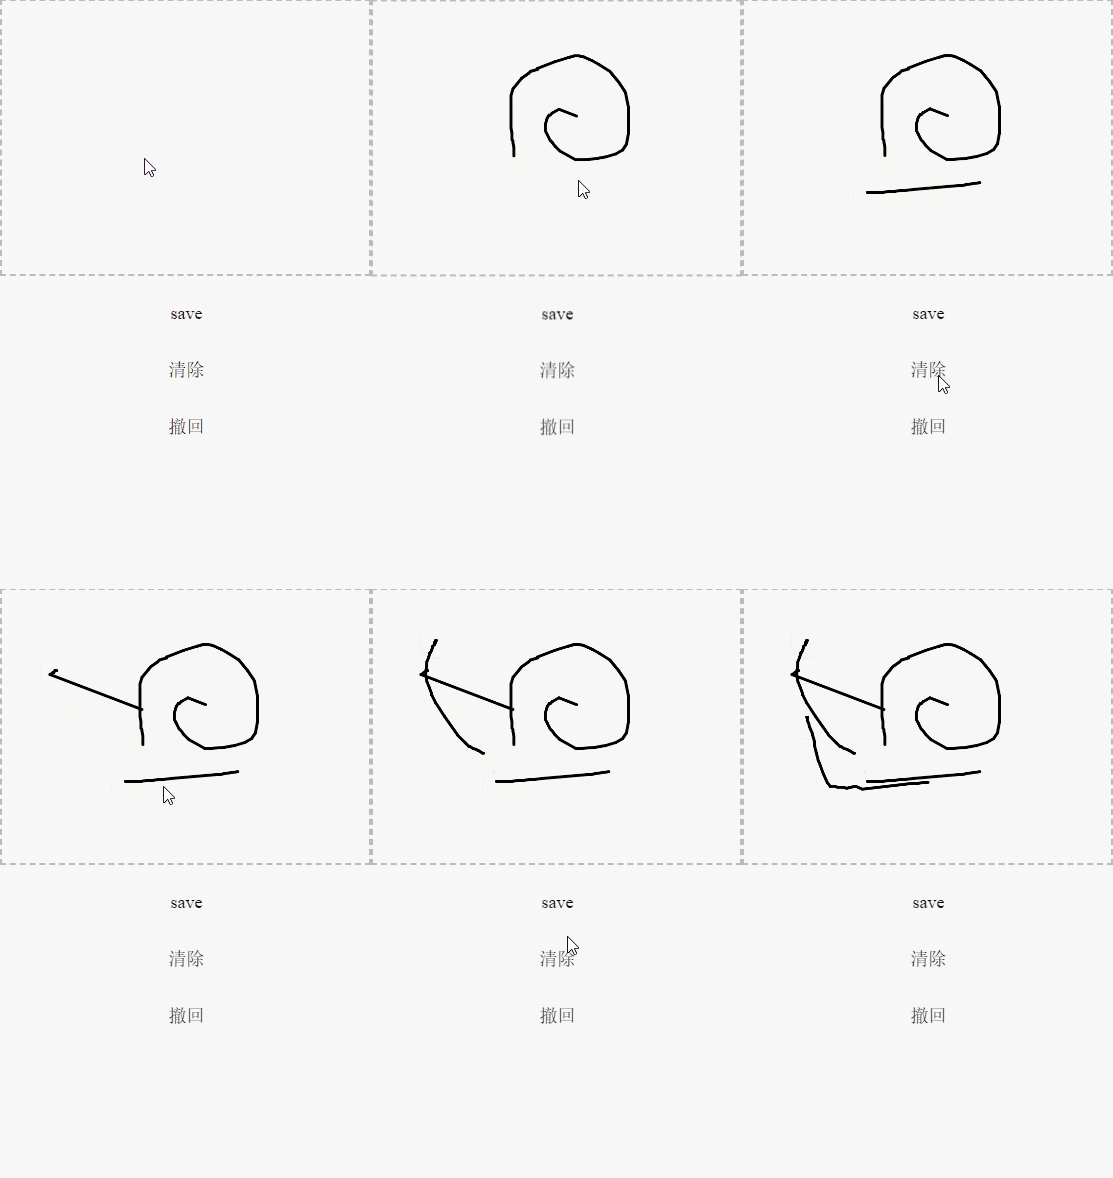
附:clearRect不生效对比图

clearRect不生效
clearRect生效

实现

axml
1
2
3
4
5
6
7
8
9
10
11
12
13
14
<popup show="{{show}}" animation="{{animation}}" position="{{position}}" onClose="onCancel" zIndex="{{zIndex}}">
<view class="box">
<slot name="toolbar"><view class="toolbar">
<button type="text" onTap="onCancel">{{cancelButtonText}}</button>
<text a:if="{{title}}" class="title">{{title}}</text>
<button type="text" onTap="onConfirm">{{confirmButtonText}}</button>
</view></slot>
<canvas width="{{width*dpr}}" height="{{height*dpr}}" style="{{'width:'+(width-4)+'px;height:'+(height-4)+'px;'}}" class="sign" id="sign" onTouchMove="move" onTouchStart="start" onTouchEnd="end" onTouchCancel="cancel" onLongTap="tap" disable-scroll="{{true}}" onTap="tap">
</canvas>
<image class="clear-icon" src="/icon/icon_clear.svg" onTap="clearClick"></image>
<!--适应底部-->
<view style="height: 24rpx"></view>
</view>
</popup>
js
1
2
3
4
5
6
7
8
9
10
11
12
13
14
15
16
17
18
19
20
21
22
23
24
25
26
27
28
29
30
31
32
33
34
35
36
37
38
39
40
41
42
43
44
45
46
47
48
49
50
51
52
53
54
55
56
57
58
59
60
61
62
63
64
65
66
67
68
69
70
71
72
73
74
75
76
77
78
79
80
81
82
83
84
85
86
87
88
89
90
91
92
93
94
95
96
97
98
99
100
101
102
103
104
105
106
107
108
109
110
111
112
113
114
115
116
117
118
119
120
121
import fmtEvent from "mini-ali-ui-rpx/es/_util/fmtEvent";
const noop = function noop() {};
Component({
mixins: [],
data: {
ctx: null,
points: [],
signImage: ''
},
props: {
show:false,
animation:true,
zIndex:100,
title:'手写签名',
cancelButtonText:'取消',
confirmButtonText:'完成',
onCancel:noop,
onConfirm:noop,
width: 300,
height: 225,
dpr: 2
},
didMount() {
//获得Canvas的上下文
this.data.ctx = dd.createCanvasContext('sign');
//设置线的颜色
this.data.ctx.setStrokeStyle("#000");
//设置线的宽度
this.data.ctx.setLineWidth(3);
//设置线两端端点样式更加圆润
this.data.ctx.setLineCap('round');
//设置两条线连接处更加圆润
this.data.ctx.setLineJoin('round');
this.data.ctx.scale(this.props.dpr,this.props.dpr)
this.data.ctx.save()
},
didUpdate() {},
didUnmount() {},
methods: {
// 画布的触摸移动开始手势响应
start (e) {
//获取触摸开始的 x,y
// this.data.ctx.save()
console.log(e)
let point = { x: e.changedTouches[0].x, y: e.changedTouches[0].y }
this.$spliceData({points: [0, 0 ,point ]})
},
// 画布的触摸移动手势响应
move (e) {
let point = { x: e.touches[0].x, y: e.touches[0].y }
this.$spliceData({points: [this.data.points.length, 0 ,point ]})
if (this.data.points.length >= 2) {
this.draw();
}
},
// 画布的触摸移动结束手势响应
end (e) {
// console.log("触摸结束",e);
//清空轨迹数组
this.setData({
points: []
})
this.data.ctx.save()
},
// 画布的触摸取消响应
cancel (e) {
console.log("触摸取消" + e);
},
// 画布的长按手势响应
tap(e) {
console.log("长按手势" , e);
},
error(e) {
console.log("画布触摸错误" + e);
},
//绘制
draw() {
let point1 = this.data.points[0];
let point2 = this.data.points[1];
this.$spliceData({points: [0, 1 ]})
this.data.ctx.moveTo(point1.x, point1.y);
this.data.ctx.lineTo(point2.x, point2.y);
this.data.ctx.stroke();
this.data.ctx.draw();
},
//清除操作
clearClick() {
//清除画布
// console.log(this.data.points)
this.data.ctx.save();
//非常重要,没有就会有问题
this.data.ctx.beginPath()
this.data.ctx.clearRect(0, 0,this.props.width, this.props.height);

this.data.ctx.draw();
},
//保存图片
saveClick() {
const that = this;
this.data.ctx.toTempFilePath({
success(res) {
console.log(res)
that.setData({
signImage: res.filePath
})
},
});
},
onCancel(e){
const event = fmtEvent(this.props, e);
this.props.onCancel(event);
},
onConfirm(e){
this.saveClick()
e.detail.value = this.data.signImage
const event = fmtEvent(this.props, e);
this.props.onConfirm(event);
},
},
});

acss
1
2
3
4
5
6
7
8
9
10
11
12
13
14
15
16
17
18
19
20
21
22
23
24
25
26
27
28
29
.sign{
box-sizing: border-box;
border: 2px #BBBBBB dashed;
}
.box{
background: #fff;
position: relative;
}
.toolbar{
padding: 0 24rpx;
display: flex;
flex-wrap: nowrap;
justify-content: space-between;
align-items: center;
}
.am-button{
font-size: 28rpx;
}
.title{
font-weight: 600;
}
.clear-icon{
position: absolute;
right: 40rpx;
bottom: 80rpx;
width: 66rpx;
height: 66rpx;
}

前言

最近在看阮老师的JavaScript基础和es6文档,其中关于异步的处理,我觉得有必要整理一下。这有助于我逐步改善自己的编程风格,提升代码质量。

Promise

文档传送门:Promise 对象
promise已经是现如今最广泛使用的异步解决方案,几乎已经没有人去使用回调来解决异步问题。callback最广为人知的问题是回调地狱,因此promise应运而生。然鹅,promise的链式调用也没有从根本上解决这个问题,.then()的调用只是换了一种写法;同时,promise的错误处理也是一个大麻烦。
Promise.all()

Promise.all()方法用于将多个 Promise 实例,包装成一个新的 Promise 实例。

1
const p = Promise.all([p1, p2, p3]);

上面代码中,Promise.all()方法接受一个数组作为参数,p1、p2、p3都是 Promise 实例,如果不是,就会先调用下面讲到的Promise.resolve方法,将参数转为 Promise 实例,再进一步处理。另外,Promise.all()方法的参数可以不是数组,但必须具有 Iterator 接口,且返回的每个成员都是 Promise 实例。
p的状态由p1、p2、p3决定,分成两种情况。
(1)只有p1、p2、p3的状态都变成fulfilled,p的状态才会变成fulfilled,此时p1、p2、p3的返回值组成一个数组,传递给p的回调函数。
(2)只要p1、p2、p3之中有一个被rejected,p的状态就变成rejected,此时第一个被reject的实例的返回值,会传递给p的回调函数。

先来看个例子:

1
2
3
4
5
6
7
8
9
10
11
12
13
14
15
16
17
18
19
20
21
22
23
24
function sleep(t){
console.log(t)
return new Promise(resolve => {
setTimeout(()=>{
console.log(t+'运行结束')
resolve()
},t)
})
}
// 这时我需要调用sleep两次,这两次调用需要同时进行,并在两次调用都返回值后打印总运行时间
function f(){
const start = new Date().getTime()
Promise.all([sleep(2000),sleep(1000)]).then(res=>{
const end = new Date().getTime()
const time = (end - start)/1000
console.log('总共运行时间为'+time)
})
}
f()
// > 2000
// > 1000
// > "1000运行结束"
// > "2000运行结束"
// > "总共运行时间为2.001"

这个方法可以应用在多个http需要同时请求时的情况。需要注意的是,这时的错误处理需要分情况处理:如果原Promise实例有自己的catch处理,则不会触发all的catch,反之会触发all的catch
Promise.race()
这个方法与all类似,区别是只要有一个Promise先改变了状态(resolve,reject皆可),就会传回回调。这个方法暂时没有想到什么应用方向(感觉它与高并发的秒杀业务流程类似)
Promise.any()
Promise.any()跟Promise.race()方法很像,只有一点不同,就是不会因为某个 Promise 变成rejected状态而结束。
这是es2021引入的新方法。谨慎使用

async/await

文档传送门:async 函数

async 函数是什么?一句话,它就是 Generator 函数的语法糖。

文档中提到了 Generator 函数,这个函数我粗略的看了一下,它的异步应用似乎只是它延申出的应用而已,本身是实现了函数的分步执行。在有了async/await之后,似乎并不需要它来实现异步了。参考:ES6+中的Generator 函数有何特别之处?
基本使用
作为一个语法糖,可以将上述代码简化:

1
2
3
4
5
6
7
8
async function f(){
const start = new Date().getTime()
// 少了.then()的链式调用,代码清晰了不少
await Promise.all([sleep(2000),sleep(1000)])
const end = new Date().getTime()
const time = (end - start)/1000
console.log('总共运行时间为'+time)
}

sleep()函数也可以用async/await写法,除了写法不同,实际运行效果一样:

1
2
3
4
5
6
7
8
9
async function sleep(t){
console.log(t)
await new Promise(resolve => {
setTimeout(()=>{
console.log(t+'运行结束')
resolve()
},t)
})
}

错误处理
如果使用多个await处理异步函数,在前一个函数返回reject时,之后不会执行。为了防止出错,需要将其放在try…catch代码块之中。
一个文档中的使用例子,可以实现多次重复尝试。

1
2
3
4
5
6
7
8
9
10
11
12
13
14
15
const superagent = require('superagent');
const NUM_RETRIES = 3;

async function test() {
let i;
for (i = 0; i < NUM_RETRIES; ++i) {
try {
await superagent.get('http://google.com/this-throws-an-error');
break;
} catch(err) {}
}
console.log(i); // 3
}

test();

持续学习

关于js的异步编程,我自认还没有完全了解,只是了解了写法和部分原理,只有持续学习,看看在实际应用中还是否会遇上问题。

几篇不错的文章(可能会更新):

  1. 100 行代码实现 Promises/A+ 规范
  2. 小哥哥小姐姐,来尝尝 Async 函数这块语法糖

前言

最近追了阮一峰阮老师的博客,真的是吾辈楷模。写博客不难,难得是一直写博客,一直保持学习、分享的精神。坚持是一件很难的事情,希望我能够坚持下去。言归正传,我是通过阮老师一篇据说被喷的博客(JavaScript 运行机制详解:再谈Event Loop)中去理解了一下,自己做了一点总结。

Event Loop

主线程从”任务队列”中读取事件,这个过程是循环不断的,所以整个的这种运行机制又称为Event Loop(事件循环)。

先从一个简单的例子来说明js的这种机制:一道简单的面试题

1
2
3
4
5
6
7
8
9
10
11
12
13
setTimeout(function() {
console.log(1)
}, 0);
new Promise(function executor(resolve) {
console.log(2);
for( var i=0 ; i<10000 ; i++ ) {
i == 9999 && resolve();
}
console.log(3);
}).then(function() {
console.log(4);
});
console.log(5);

这段代码可以直接在浏览器中运行,其中打印的顺序为2,3,5,4,1
js是单线程的,执行的过程从上到下

  1. setTimeout函数放入“任务队列”
  2. promise里函数直接执行,打印 2,resolve()不会影响后面代码执行,打印3,then里的函数会放在当前执行的最后
  3. 打印5
  4. 来到当前函数下个循环之前,执行then里的函数,打印4
  5. setTimeout函数已就绪,打印1

关于setTimeout函数有几点需要注意:

  • 最小执行时间根据浏览器有所不同,如果需要表现出先后执行顺序,最好设置在16ms以上
  • 设置的时间不一定会精确,可能因为当前代码延迟出现不准的情况

需要注意的是,setTimeout()只是将事件插入了”任务队列”,必须等到当前代码(执行栈)执行完,主线程才会去执行它指定的回调函数。要是当前代码耗时很长,有可能要等很久,所以并没有办法保证,回调函数一定会在setTimeout()指定的时间执行。

vue中的$nextTick

官方文档:异步更新队列

Vue 在内部对异步队列尝试使用原生的 Promise.then、MutationObserver 和 setImmediate,如果执行环境不支持,则会采用 setTimeout(fn, 0) 代替。

如果$nextTick使用原生的 Promise.then,那么它应该与Promise.then平级,执行顺序取决于代码的先后,事实上确实如此。
在node.js中也存在process.nextTick方法,不过因为不熟悉,暂且不表。

小程序中的wx.nextTick

官方文档:wx.nextTick
小程序中还未接触过这个方法,但是在vant-weapp源码中存在。官方文档的解释比较模糊,但大致可以确定为下一个时间段(tick)执行。

最后

了解到这些可能不会真正意义上提高你的代码水平,它很少出现在日常的代码中。不过这些东西,知道就是知道,总会有bug和坑等待你的发现,到时候,说不定身边正好有一根绳子。